Metal Roofing Panels: Standing Seam Installation

Do you have a standing seam roof, and are curious about installation process? Standing Seam Metal roofing panels are becoming increasingly popular, as they offer longevity, energy efficiency and are arguably more aesthetically pleasing than traditional asphalt roofing.
This article will serve as your all-inclusive guide on how to install a standing seam metal roof by providing step-by-step instructions for each stage of the installation process. Dive right in and master the art of standing seam installation with our comprehensive method!
Understanding Standing Seam Metal Roofing

A standing seam panel consists of various interconnected panels. Each unique panel locks together at the seams, creating a waterproof and wind-resistant cover for your home or building.
Fasteners secure these panels, keeping them in place and often hidden beneath the panel to maintain a seamless aesthetic.
This type of roofing boasts several advantages over traditional asphalt shingles. For one, its durability far exceeds that of conventional materials – it can resist high winds, hail damage, and even fire.
Also worth noting are the energy-saving properties: well-insulated standing seam roofs contribute significantly to maintaining indoor temperatures regardless if it’s summer or winter outside!
Metal roofs’ design complements many architectural styles smoothly due to their sleek look and clean lines. Whether you have a modern downtown loft or a rustic country barn, there’s a standing seam roof style that fits effortlessly with your property’s overall aesthetic appeal.
Materials Needed for Standing Seam Installation

Installing a standing seam panel requires specific materials to ensure a successful project. Here are the essential materials you’ll need:
- Roof Decking: These boards, often made of plywood or oriented strand board (OSB), serve as the base for your roof.
- Underlayment: This additional layer, typically comprised of felt or rubber, covers the roof decking to offer added water damage protection.
- Lock Strip: Utilized at the roof’s gable and rake edges, this strip of metal helps secure your roof against high winds.
- Drip Edge: Installed on the perimeter of the roof, these pieces ensure that water runoff goes into gutters rather than dripping down the sides.
- Metal Panels: The main component of your standing seam roof, these panels interlock at the seams for maximum durability and water resistance.
- Clips: These small but essential parts secure your panels to the underlayment without puncturing the metal itself.
- Z Bar Flashing: This special type of sealant prevents water from seeping in between roofing sections and components.
- Ridge Cap: Once all panels are installed, this final piece covers any exposed section along the ridge line for a finished look.
Step-by-Step Guide to Install a Standing Seam Metal

Learn the exact process of installing standing seam metal roofing, from removing old materials to attaching the final ridge cap. Discover the essential steps and techniques for a successful installation.
Come explore and master the art of standing seam installation!
Removal of Old Roofing Materials
Getting rid of old roof is an indispensable part of installing a standing seam. This process involves not just removing the visible layers but also clearing off the roof deck for a clean slate.
It ensures that your new metal roof panels sit properly and function as intended. Any remnants from the previous installation could potentially hinder the effectiveness and longevity of your standing seam.
Therefore, thorough removal is crucial to ensure optimal performance of your new roof.
Installation of Lock Strips and Drip Edge

Lock strips and drip edge prove essential during the standing seam installation. First, you’ll secure lock strips at the gable and rake edges to offer protection from high winds.
These strips sit under your metal panels providing added stability and security. Moving on, installment of the drip edge takes place. This is fixed along the perimeters of your roof ensuring rainwater smoothly transitions into gutters instead of dripping onto surfaces below or going underneath roofing material.
Both components play significant roles in bolstering effectiveness and lifespan of your standing seam when installed correctly.
Underlayment Application
The underlayment is an essential step in the standing seam installation. It serves as an additional layer of protection against water damage. Once the roof decking is prepared, the underlayment is applied before installing the full panels.
Its main purpose is to waterproof the roof and prevent leaks by acting as a barrier against moisture. By properly applying underlayment, homeowners can ensure that their roofs remain watertight and protected from potential damage caused by water seepage.
Installation of Standing Seam Metal Panels

Standing seam metal panels are a key component of a standing seam metal roof. The installation process involves carefully attaching these panels to the roof decking using clips and fasteners.
The interlocking design of the panels ensures a watertight seal, providing superior protection against leaks and weather damage. These panels are available in various colors and finishes to suit different architectural styles and preferences.
As part of the installation process, it’s important to ensure proper alignment and attachment of each panel for a seamless appearance and maximum durability. The use of high-quality materials and following industry best practices is crucial for achieving a successful installation that will last for years to come.
Installing Z Bar Flashing
Z bar flashing plays a crucial role in the installation of a standing seam metal roof. It is used to connect the metal panels to the ridge cap, ensuring a secure and watertight seal.
This flashing is specifically installed at the ridge to prevent water from seeping under the gap created by the seams. Made of durable and weather-resistant materials like metal, Z bar flashing ensures the integrity and waterproofing of your roof.
Its installation process is explained in detail in our step-by-step guide to standing seam installation, so you can follow along easily and confidently during your roofing project.
Ridge Cap Installation
Ridge cap installation is a crucial step in the process of standing seam installation. The ridge cap serves as a protective cover that fills the gap between the panels and provides a polished, finished appearance to the roof.
Made of durable metal, it comes in various colors to match your roofing design. Securing the ridge cap involves using Z bar flashing, which ensures its stability and prevents water and other elements from penetrating through the roof’s highest point.
Make sure to follow proper installation techniques for a long-lasting and effective ridge cap on your standing seam metal roof.
Differences Between Standing Seam Metal and Screw-Down Panel Metal

Understanding the differences between standing seam metal and screw-down panel metal roofs is key to making an informed decision. Here are some crucial points of distinction:
1. Attachment Method: Standing seam metal roofs use clips to secure the panels. Conversely, screw-down panel metal roofs rely on screws driven directly through the metal into the structure beneath.
2. Seam Structure: The panels in a standing seam metal roof interlock together at the seams, creating a continuous, sealed surface. In contrast, screw-down panel metal roofs lack these interlocking seams.
3. Installation Locations: Standing seam metal roofs are typically installed on homes due to their superior weather-proofing capabilities. Screw-down panel metal roofs, however, are commonly used over non-heated spaces like barns and sheds.
4. Wind and Water Resistance: The lock strips and drip edge in standing seam metal roofs help prevent wind and water from getting under the new panel layouts, a feature absent in screw-down roofs.
5. Lifespan and Maintenance: Due to their construction and installation method, standing seam metal roofs often last longer and require less maintenance than screw-down panel metal roofs.
Key Points for Successful Installation

Plan for movement, use pre-bent trim pieces, and ensure correct panel placement and attachment for a successful standing seam installation.
Planning for Movement
Planning for movement is a critical aspect of standing seam installation. Due to the thermal expansion and contraction of panels, it is important to account for potential movement.
To prevent damage to the roof, proper spacing and installation of expansion joints are necessary. These joints allow the roofing underlayment to expand and contract without causing any harm.
The specific placement and spacing of these expansion joints should be determined based on the climate and temperature conditions in the area where the installation takes place. By considering movement during the planning process, a successful standing seam installation can be achieved.
Importance of Pre-Bent Trim Pieces
Pre-bent trim pieces play a crucial role in the successful standing seam installation. These pre-formed pieces ensure a precise and professional-looking finish, giving your roof a polished appearance.
Not only do they help achieve a watertight seal at the seams, preventing leaks and water damage, but they also save time and effort during the installation process. By eliminating the need for on-site bending and fabrication, pre-bent trim pieces reduce the risk of errors or mistakes that could compromise the integrity of your roof.
Additionally, these trim pieces provide added strength and stability to your roof, enhancing its durability and longevity. So when installing a standing seam metal roof, don’t overlook the importance of using quality pre-bent trim pieces for a reliable and long-lasting solution.

Correct Panel Placement and Attachment
Proper panel placement and attachment are essential for a successful standing seam installation. The metal panels lock together at the seams and are securely fastened underneath, ensuring stability and preventing movement.
Additionally, a lock strip is used at the gable and rake edges to hold the panels in place during high winds. Clips are also utilized to secure the panels to the roof decking, providing further stability.
To ensure a proper seal, Z bar, which is a type of metal flashing, connects the metal panels to the ridge cap. With correct panel placement and attachment, you can have confidence in your standing seam metal roof’s durability and longevity.
The Lifespan of a Standing Seam Metal Roof
A standing seam metal roof is known for its exceptional durability, which translates into a longer lifespan compared to other roofs. The exact lifespan of a standing seam metal roof can vary based on factors such as the quality of installation and maintenance.
However, with proper care and maintenance, these roofs can last up to 70 years or more. Some manufacturers even offer warranties ranging from 30 to 50 years, highlighting the confidence they have in the longevity of these roofs.
This makes a standing seam metal roof a cost-effective choice in the long run, providing homeowners with peace of mind and significant savings over time.
Importance of Proper Roof Installation
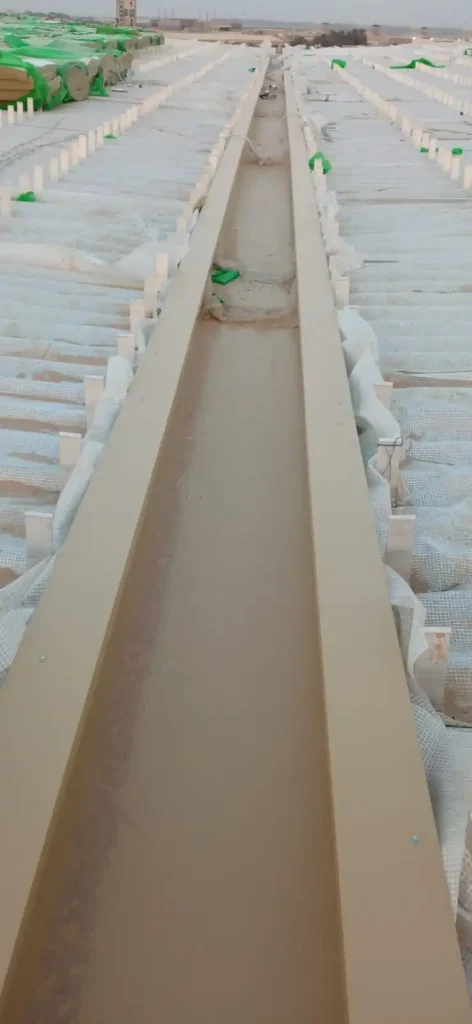
Proper roof installation is crucial for the long-term performance and durability of a standing seam metal roof. When lock strips, drip edge, underlayment, and flashing are installed correctly, they help prevent wind and water damage.
This ensures that your roof can withstand harsh weather conditions without compromising its integrity.
Additionally, tearing off old roof before installing a new standing seam metal roof allows for a thorough assessment of any existing damage or issues with the decking.
By addressing these problems during the installation process, you can ensure that your new roof will be structurally sound and provide optimal protection for your home or building.
When a standing seam metal roof is properly installed, it offers several benefits such as long-term durability and peace of mind. Metal roofs are known for their resistance to extreme weather events like hurricanes and hail storms.
With proper installation techniques in place, you can have confidence knowing that your metal roof will last for many years to come.
It’s important to note that correct installation requires using the right materials such as lock strips, drip edge, underlayment, metal panels, clips, Z bar flashing at the ridge cap.
By following step-by-step guidelines during the installation process – including tearing off old roof first – you can ensure that every component is in place correctly.
This attention to detail sets the foundation for a successful and reliable standing seam installation.
Remember: Proper installation means investing time and effort upfront so you can enjoy all the benefits of a well-installed standing seam metal roof down the line

Conclusion
In conclusion, understanding the step-by-step process of standing seam installation is crucial for successful roofing projects. By knowing the materials needed and following proper techniques, homeowners can ensure a long-lasting and durable metal roof.
Whether it’s removing old roof or installing lock strips and drip edge, attention to detail is key in achieving a professional installation. Don’t forget to plan for movement, use pre-bent trim pieces, and securely attach panels for optimal results.
With this essential guide, you can confidently install standing seam metal roofing and enjoy its benefits for years to come.