A Comprehensive Guide To Standing Seam Roof Panel Installation

Remodeling your home and considering a standing seam roof but unsure of the installation process? Did you know that this type of roofing system not only offers superior durability, but it also provides a clean, modern look to any structure? In our comprehensive guide to standing seam roof panel installation, we’ll unravel each step clearly and briskly—from materials needed to the complete procedure—streamlining the complex operation for you.
Ready to roll? Let’s dive into an exciting roofing adventure where practicality meets style!
Understanding Standing Seam Metal Roofing

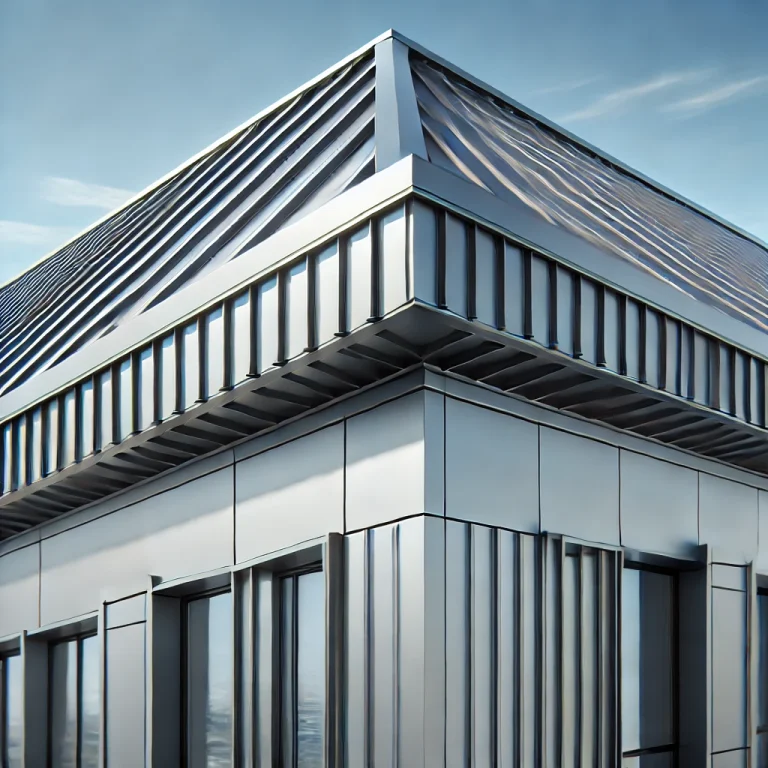
Standing Seam Metal Roofing stands out for its durability and aesthetic appeal. It refers to a type of roofing where the edges of each metal panel are connected in a raised seam, hence the name “standing seam.” This connection is either formed by locking together or mechanically seaming the panels, making them withstand various weather conditions effectively.
These roofs utilize concealed fasteners, which differentiates them from corrugated metal roofs that have exposed ones. The design includes broad flat areas between each panel’s vertical legs, further adding to their sleek and modern look.
Besides being visually attractive, standing seam metal roofs provide energy efficiency – an added benefit attracting many homeowners.
Materials Needed for a Standing Seam Metal Roof Installation

Gearing up for a standing seam roof panel installation requires having the right materials. These include lock strips to secure the panels, a drip edge for directing water flow, an underlayment or ice and water shield to prevent seepage, standing seam metal panels that form the core of your new roof, Z bar flashing for waterproofing intersections, and a ridge cap to cover the peak of your roof.
Lock strips
Lock strips play an essential role in the standing seam roof panel installation. Constructed using robust materials like aluminum or stainless steel, they offer longevity and durability to handle challenging weather conditions.
By holding the metal panels securely along your roof’s edges, lock strips help maintain a stable standing seam roof panel installation while providing resistance against wind uplift. This allows homeowners to enjoy not only functionality but also peace of mind.
Equally important is the contribution of lock strips to a roof’s aesthetic appeal and overall integrity. Their sleek design blends seamlessly into the architecture, enhancing visual interest without drawing undue attention.
More than just for aesthetics though, these components serve as frontline defenders keeping water and moisture at bay – an integral part of protecting your home from inclement weather damage.
In essence, lock strips are indispensable elements that ensure successful and efficient standing seam roof panel installations.
Drip edge

A drip edge plays a critical role in the optimal operation of any standing seam metal roof. Made up of sturdy metal flashing, this component is installed along the edges of the roof deck before laying down the standing seam panels.
It serves an essential purpose – directing falling liquids away from the structure and prevent them from seeping inside. For maximum efficiency, it should extend about an inch beyond the edge of your roof.
This simple yet effective addition ensures your new metal roof withstands various weather conditions while keeping your home dry and safe.
Underlayment/ice and water shield
The underlayment or ice and water shield plays a crucial role in standing seam roof panel installations. These elements ensure the first line of defense against severe weather conditions by providing an extra layer of waterproofing and weatherproofing for your roof system.
Acting as a moisture barrier, it is particularly effective in safeguarding parts of the roof susceptible to water seepage and ice damming. The use of self-adhering, high heat ice, and water shield serves well for this purpose.
It’s imperative to know that successful application hinges on correct standing seam roof panel installation procedures; any mistakes here can seriously impact your roof’s long-term performance and durability.
Standing seam metal panels

Standing seam metal panels are an essential part of any efficient roofing job. These Galvalume-coated steel or aluminum structures provide durability, longevity, and a neat aesthetic appeal.
The standing seams, typically between 12 to 24 inches wide, feature unique lips or ribs that overlap the next panel providing a secure connection. They offer homeowners a concealed fastener system which means no visible screws on the surface following standing seam roof panel installation — an attribute that exudes style and elegance for any type of home.
One of the most common materials used is either stainless steel or aluminum due to their resistance against rust and corrosion. Especially useful in regions with heavy rainfall or snowfall, these easy-to-install snap-locked options can transform roof safety as well as design aesthetics beneficially.
Z bar flashing
Z bar flashing is a key component in installing a standing seam metal roof. This piece of material, typically taller than the ribs on the metal panels, serves as an efficient and reliable watertight seal for your new roof.
Its Z shape gives it its name and enables it to fit snugly between the panels.
To ensure its effectiveness, installers secure Z bar flashing using mastic tape. The process involves tucking it neatly into place at specific intervals. This transition trim helps to lock together individual standing seam panels securely, preventing leaks or damage due to weather conditions.
Ridge cap

The ridge cap is an essential component in standing seam roof panel installations. It’s so crucial because it sits at the very peak of the roof, compelling all elements of weather away from your home.
The cap uses identical material and color as the panels, presenting a seamless look to your roof design. Proper standing seam roof panel installation is critical for long-lasting protection and function; it ensures no leaks pop up during heavy rainstorms or intense sun exposure, keeping your interior safe and dry.
And lastly, this piece brings an aesthetic finish to the structure with its uniform appearance along other roofing components like Z bar flashings or standing seam panels.
Process of Standing Seam Roof Panel Installation
Ready to tackle your new roofing project? Learn the step-by-step process of installing a standing seam metal roof, from removing the old materials to fastening the final panels. Discover pro tips for each task and common pitfalls to avoid.
Ready to transform your rooftop with a new metal shine? Dig into the complete guide below!
Step 1: Remove old roofing materials

A crucial first step in the process of installing a standing seam metal roof is to clear off the old roofing materials from your rooftop. Whether made of asphalt, tile or other types of materials, every piece must be removed for optimal standing seam roof panel installation outcomes.
It’s absolutely necessary to create a clean slate on which your new standing seam panels will lie. The task proves essential as it ensures that any underlying structural issues can be discovered and addressed before moving forward with the standing seam roof panel installation.
This operation may involve using special tools to disengage nails and fasteners that hold down old shingles or tiles. Safety should always be prioritized during this potentially dangerous stage; homeowners are advised to hire experienced roofing contractors to avoid harm and ensure proper disposal of waste material.
Step 2: Install lock strips and drip edge
Lock strips come into play at this stage of the standing seam roof panel installation process. They are placed along the rakes and eaves of your roof. This strategic positioning secures the metal panels, enhancing overall sturdiness.
By using screws or nails spaced about 8-12 inches apart, you install these essential components effectively.
Next up is the drip edge – another crucial element for a watertight standing seam metal roof. This component covers seams between roofing panels, keeping water from seeping in and causing damage over time.
A robust lock strip and drip edge work hand in hand to contribute to your roof’s longevity and durability.
Step 3: Apply underlayment/ice and water shield

The process of applying underlayment or ice and water shield is a critical step in installing a standing seam metal roof. First, roll the underlaymentacross the width of your roof.
Fasten it down as you go to ensure stability and maximum efficiency against any incoming moisture intrusion. As you install this protective layer from eave to ridge, overlap each section by at least 6 inches to create another barrier against potential leaks.
These overlaps also help fasten the synthetic roofing underlayment securely onto your roof deck. Pro tip: In regions that experience extreme weather conditions, consider using high heat ice and water shields for extra protection! This essential material acts as an effective watertight seal, defending your home from damaging wind-driven rain and melting snow seepage — crucial for preserving not just the aesthetics but also the structural integrity of your new metal roof over time.
Step 4: Install standing seam metal panels
The standing seam roof panel installation begins with ensuring that each panel is correctly aligned at the eaves and ridge of your roof. Fasteners, either screws or nails, secure the first panel into place along the edge of your roof’s slope.
Then each subsequent metal panel overlaps by one inch on the side for extra rigidity. Precision during this overlap process ensures a tight seal against harsh weather conditions like wind or rain.
In some cases, it may be necessary to field seam or crimp joints together for waterproof protection. Once these steps are meticulously completed, you have effectively installed standing seam metal panels for a durable roofing solution that can last decades with proper maintenance.
Step 5: Install Z bar flashing and ridge cap

In the fifth step of standing seam roof panel installation, it’s time to place the Z bar flashing. This unique component gets its name from its distinctive Z shape and plays a critical role in connecting your metal panels to the ridge cap.
Carefully position this vital piece between panels directly on the ridge for optimal performance. Following that, install the ridge cap over top of our ‘Z’ shaped friend. The primary purpose of this cap is to provide an extra layer of sealant and protection right where you need it most – at your roof’s peak or ridge line!
FAQ about Standing Seam Metal Roofing Installation
Find answers to all your burning questions about standing seam roof panel installation, including the difference between standing seam and screw-down panels, proper standing seam roof panel installation tips, understanding asphalt shingles and more.
Dive in for a deeper understanding of how to ensure your new roof lasts for decades.
Difference between standing seam metal and screw-down panel metal
Standing seam metal and screw-down panel metal roofs function uniquely. The key variation lies in the concealed fasteners of standing seam metal roofs, hidden from view, while screw-down panels have exposed screws visible on top.
This distinction is not just aesthetic; it impacts the durability of your roof. Visible screws on a screw-down panel roof make it susceptible to rust, leaks, or loosening over time due to weather exposure.
In contrast, standing-seam panels feature hidden clips that secure them to the roof deck and endure harsh conditions far longer than their counterparts. Notably though, superior performance comes with a higher price tag: standing-seam roofing tends to cost more than twice as much as screw-down variants.
Types of standing seam metal roofs

There are a variety of standing seam metal roofs each with unique features and benefits. Mechanically seamed roofs, for example, use clips and fasteners to tightly secure panels together.
This security results in increased durability under severe weather conditions. Nail-hemmed types feature folded edges that add strength and stability while providing an aesthetically pleasing appearance on standing seam roof panel installations.
Snap-locked standing seam roofs offer easy installation as the panel edges easily snap together without need for extra tools or equipment. Lastly, exposed fastener systems utilize visible screws through the face of the panel into a solid substrate below for direct attachment to your home’s structure.
As you examine each type further, consider using symmetrical panels which have identical sides allowing better manipulation during expansion and contraction induced by thermal changes.
Alternatively, asymmetrical panels can be used where one side is wider than the other helping distribute loads differently across roof deck enhancing structural performance.
In addition to these options there are also batten seam panels often made from steel or aluminum available in widths ranging from 12″ to 24″. These offer their own advantages including higher seams which enable larger water runoff volumes thus effectively keeping moisture out even during heavy rainfall incidents.
Lifespan of standing seam metal roof

Standing seam metal roofs are celebrated for their impressive longevity. Under ideal conditions, these durable structures can serve your home for 50 years or more – a significant upgrade compared to traditional asphalt roofing materials which have an average lifespan of just 12-20 years.
Some sturdy and well-installed metal roofs even hit the remarkable mark of serving homeowners for over 75 years! The range in life expectancy is broad, stretching from about 15 to an astonishing 60 years, depending largely on the quality of standing seam roof panel installation and maintenance throughout its lifetime.
They prove their worth by withstanding extreme weather conditions without a flinch, making them a reliable choice for those seeking long-term protection and style side by side.
Proper preparation for new roof installation
Proper preparation is a crucial step for new standing seam roof panel installation. This process starts with completely removing all the old roofing materials including any shingles, underlayment and flashings to clear the deck of debris and expose its surface.
It ensures that you start with a clean base, enabling effective placement and fastening of new roofing components.
Next in line is inspecting the bare roof deck thoroughly for any signs of damage like rot or sagging which if present needs immediate repair. This routine check highlights structural issues that might compromise your roofing’s performance if overlooked.
Then comes installing an ice or water shield, especially around critical areas such as valleys and protrusions providing an additional layer of protection against leaks caused by rain or snow.
Install lock strips along the eaves which serves as secure points to hook panels onto while installing standing seam metal roofs.
Signs of a bad roofing job

Poorly installed roofs can create serious problems. Leaks after the first rain are a big red flag, signaling that water is seeping through gaps that should be tightly sealed. A roof with an uneven appearance also points to substandard workmanship; it shows lack of uniformity in design due to possible haphazard installation.
Missing crucial components of roofing structure or improper fitting of these elements, such as flashings or underlayment, are other clear signs that the job wasn’t done right.
Pros and cons of air gun vs hand nailing
When it comes to standing seam roof panel installation, two common methods that are often used are air gun nailing and hand nailing. Both methods have their own advantages and disadvantages.
| Air Gun Nailing | Hand Nailing | |
|---|---|---|
| Pros | Air gun nailing is more efficient and faster than hand nailing, making it an ideal choice for larger projects. As it is powered by a pneumatic nail gun, it can significantly cut down the time spent on installation. | Hand nailing offers better control and precision, making it more suitable for smaller projects or intricate roofing works. Additionally, it does not require the use of an expensive pneumatic nail gun, which can be a significant investment. |
| Cons | Though it is efficient, air gun nailing can lead to overdriving or underdriving nails if not operated correctly. This can affect the quality and durability of the standing seam roof panel installation. It also requires an investment in a pneumatic nail gun. | Hand nailing, while offering control and precision, is labor-intensive and time-consuming. It may not be an efficient method for larger projects and could extend the overall time for the roofing installation. |
The choice between air gun nailing and hand nailing ultimately depends on factors such as the size of the project, the experience of the contractor, and personal preference.
Considerations for roof tear off vs. roof nail-over
The decision to opt for a roof tear-off or a roof nail-over during your standing seam roof panel installation isn’t always straightforward. It primarily depends on the condition of your existing roof, the local building regulations, and your personal preferences. Here’s an overview:
| Consideration | Roof Tear-Off | Roof Nail-Over |
|---|---|---|
| Existing Roof Condition | A tear-off is often necessary if the existing roof has multiple layers or is damaged beyond repair. | Nail-over is a feasible choice if the existing roof is still in good condition and there are no structural concerns. |
| Building Regulations | Local building codes may require a complete tear-off. | Some building codes may allow for a nail-over, providing a quicker and more cost-effective solution. |
| Personal Preference | Some homeowners prefer a tear-off as it allows for a completely new roof, ensuring all underlying issues are addressed. | Others may opt for a nail-over due to its cost-effectiveness and simplicity, especially when the existing roof is in good shape. |
| Underlying Issues | Tear-off allows roofing professionals to evaluate and repair any structural issues or damages. | Nail-over doesn’t provide the opportunity to address any hidden problems beneath the existing roof. |
| Cost | Tear-off tends to be more expensive due to the extra labor and disposal of the old roof materials. | Nail-over can be less costly as it eliminates the need for disposal and requires less labor. |
Remember, regardless of your choice, it is crucial to consult with a professional roofer to determine the best approach based on your specific circumstances.
Noise level during installation
Installing a standing seam metal roof can cause noise levels around 61 decibels, similar to an ordinary conversation. This level of sound is often viewed as manageable by many homeowners deciding to install this kind of roofing system.
Misconceptions about the metal roofing being excessively loud during rainfall are largely unfounded, especially when the standing seam roof panel installation is done correctly.
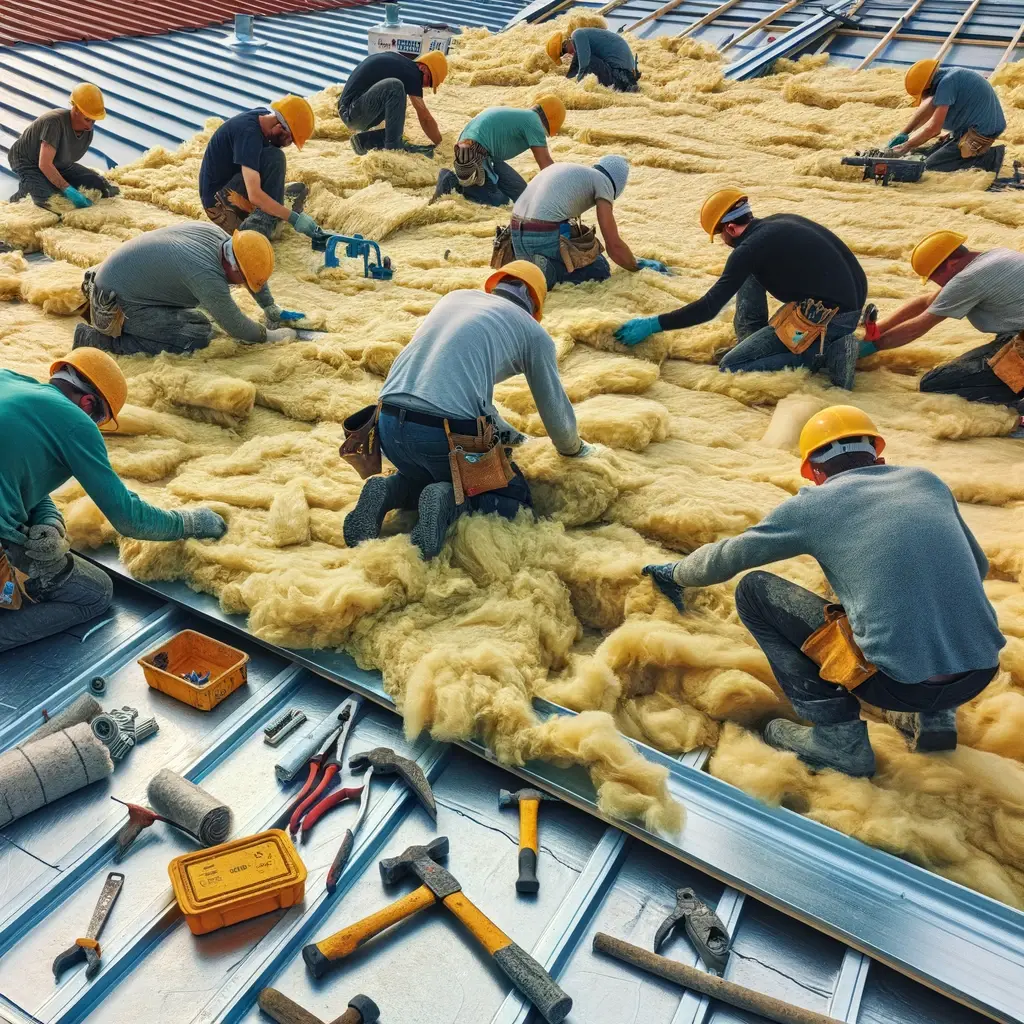
The nature of some profiles and systems may lead to occasional noise under certain conditions. However, most designs aim to minimize any potential clatter or rattle. Some steps taken towards noise reduction involve installing insulation beneath the panels for energy efficiency and comfort measures.
To reduce noise issues further, snow guards installed through non-penetrating methods help prevent snow accumulation on standing seam roofs.
Alternative options for natural light
Skylights on standing seam roofs provide an excellent source of natural light, reducing the need for artificial lighting during daytime. These add more than just aesthetic value; they also improve energy efficiency inside buildings.
Similarly, using transparent roofing materials like polycarbonate or glass panels can amplify natural light while retaining the durability and weather resistance characteristic of metal roofs.
The beauty of a standing seam metal roof extends beyond its sleek design to incorporating options that allow homeowners or architects to maximize natural illumination in their spaces.
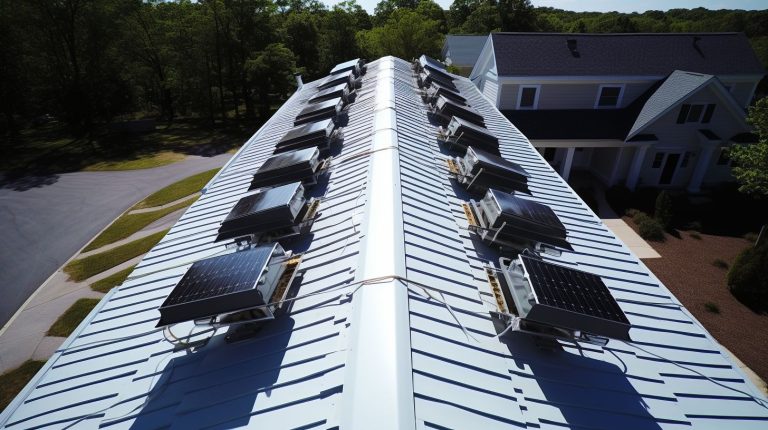
For those wanting to go green, mounting solar panels on these roofs is a viable choice as well, converging aesthetics with sustainability effectively.
Installing a metal roof over an asphalt roof
Installing a metal roof over an asphalt one is indeed possible but comes with its own set of potential drawbacks. One primary concern is the issue of condensation that can build up between the old and new roofs, leading to moisture damage over time.
To mitigate this problem, it’s essential to use proper underlayment during standing seam roof panel installation. This material serves as an extra layer of protection from weather-related elements while providing additional insulation.
A common method involves removing all remnants of the initial asphalt roof before embarking on the standing seam roof panel installation process onto the original structure for ensuring longevity and effectiveness in performance.
Notably, homeowners might notice cost savings due to eliminating any surface preparation needs once they opt for a complete tear-off instead of just overlaying their new metal roof on top.
Understanding asphalt shingles

Asphalt shingles combine affordability and a variety of style options, making them a popular choice for homeowners. However, they don’t quite match up to the durability and longevity offered by standing seam metal roofs.
For one, asphalt shingles cannot be recycled at the end of their life cycle, increasing waste material in landfills. They lack strength too—standing seam metal roofs are significantly more resistant to harsh weather conditions and more effective at protecting your home.
Furthermore, labor costs for installing asphalt shingles tend to be higher compared to corrugated metal roofs due to their complexity in placement. Lastly, despite its low initial cost, asphalt shingles offer lower curb appeal than standing seam metal roofs which can affect the value of your property over time.
Pros and cons of nail-over vs. roof replacement
A nail-over, also known as a roof overlay, is when a new layer of shingles is nailed over the existing roof. On the other hand, a roof replacement involves removing the old roof and installing a new one. Both methods have their benefits and drawbacks.
| Nail-over | Roof Replacement | |
|---|---|---|
| Pros | Less expensive than a total roof replacement. Quicker and easier to install. No need to worry about disposing of old roofing materials. | Allows for the inspection and repair of the roof deck, this could prevent future issues. Increases the value of a home more than a nail-over. Provides a chance to upgrade to a more durable and energy-efficient roofing material like standing seam metal roofs. |
| Cons | Doesn’t allow for any necessary repairs to the roof deck. Can add significant weight to the roof structure. Not advisable if the existing roof is severely damaged. | More expensive upfront than a nail-over. Takes longer to install. Requires disposal of old roofing materials. |
Deciding between a nail-over and roof replacement depends on factors such as the condition of the existing roof, the budget, and the homeowner’s long-term plans for the property. While a nail-over might be less expensive initially, a roof replacement could provide long-term savings, especially if the new roof is a standing seam metal roof, known for its energy efficiency and durability.
Importance of proper roof installation
Proper standing seam roof panel installation plays a vital role in safeguarding your home. It ensures the durability of the roofing system, and significantly extends its lifespan. A correctly installed standing seam metal roof can last two to three times longer than lighter gauge, screw-down metal roofs.
Not to mention, it also enhances energy efficiency within your home by effectively regulating temperature and preventing heat loss during winters or cool air escape during summers.
Following best practices for standing seam roof panel installation techniques and using suitable flashing methods ensure superb weather-tightness, guarding against harmful elements like wind, rain or snowstorms that might otherwise compromise the integrity of your house structure if left unchecked.
Therefore hiring skilled roofing contractors who adhere to safety measures is crucial for a successful and sturdy roof set up.
Tips for reading and understanding roof estimates

Grasping the skill to read and comprehend roofing estimates is essential for every homeowner. It’s not rocket science, but certainly does require some understanding of basic terminology and aspects related to roofing. Here are some tips that can help you navigate through a roofing estimate:
- Understand the Parts of Your Roof: Knowledge about the fundamental parts of your roof like shingles, underlayment, flashing will assist you in making sense of the terms used in an estimate.
- Differentiate Material Costs: Dissect the price quotation into material and labor costs. A standing seam metal roof ranges from $650 to $850 per square as per ‘Important Facts.’
- Study Workmanship Details: Keep an eye on details about workmanship, duration of work, warranties offered, and other crucial aspects.
- Valuation of Roof Removal: The cost incurred in removing old roofing materials should be included in the valuation.
- Identifying Extra Charges: Look for additional expenses such as permits or dumpster rental which might not be included in the initial estimate.
- Ignoring Lowest Bids: Don’t be lured by the lowest bid; it might end up costing more due to inferior materials or unskilled labor.
Conclusion
This guide arms you with knowledge to tackle a standing seam roof panel installation project confidently. Equipped with this information, homeowners can make informed choices about their roofing needs.
Understanding the detailed process can also help identify and hire competent, skilled professionals for successful standing seam roof panel installations. The intricacies of standing seam metal roofs no longer need to be a mystery!